Quickstart Guide
Get up and running with Gorgonetics in a few minutes. No genome file required — the app comes with demo data to explore.
Launch the App
When you open Gorgonetics for the first time, it loads demo pets and gene templates automatically. You'll see two sample pets in the left sidebar — a BeeWasp and a Horse — ready to explore. No import needed.
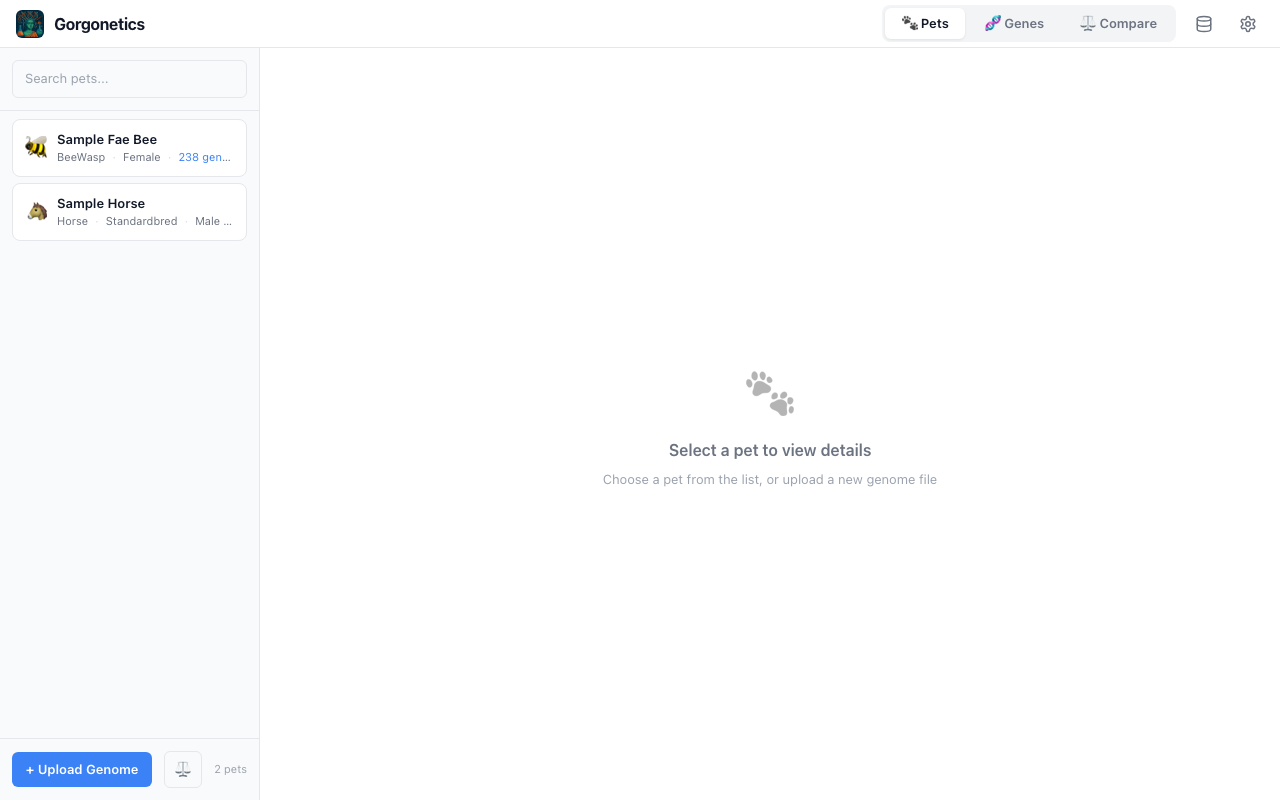
Browse Your Pets
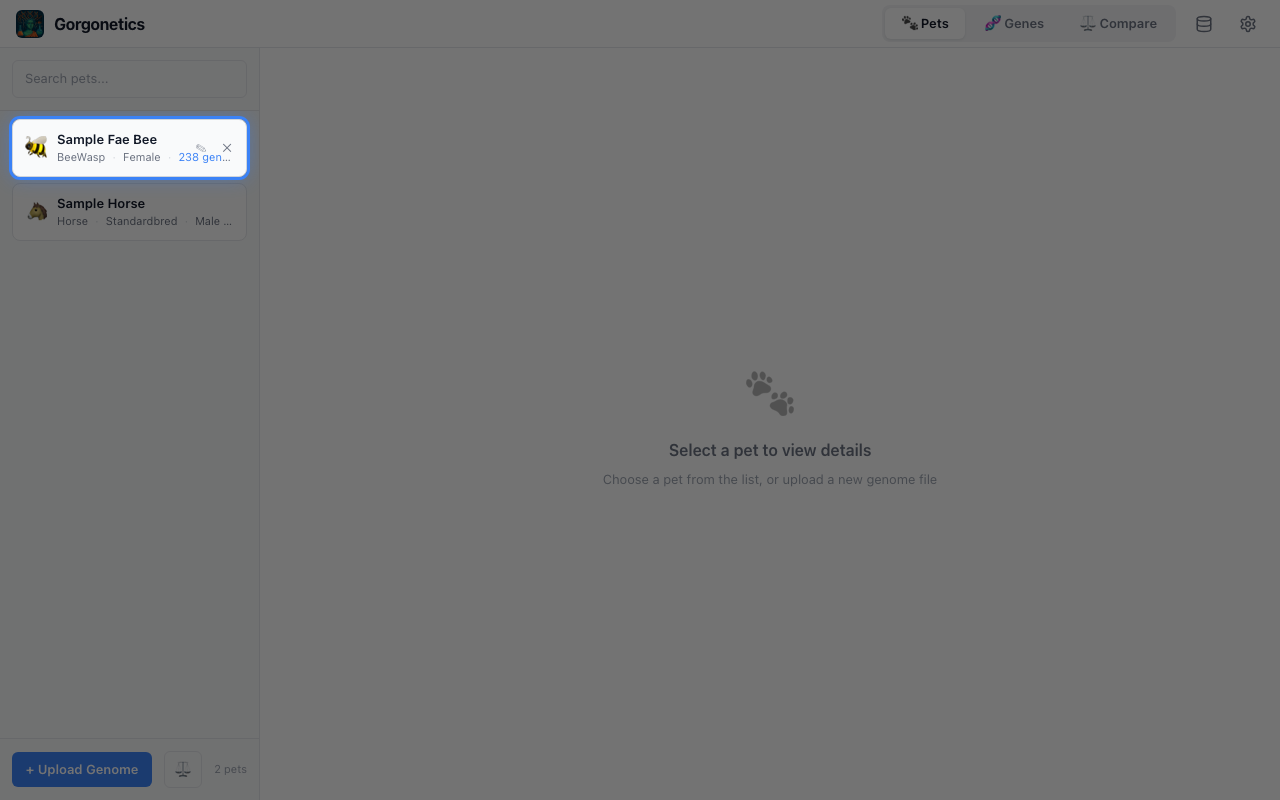
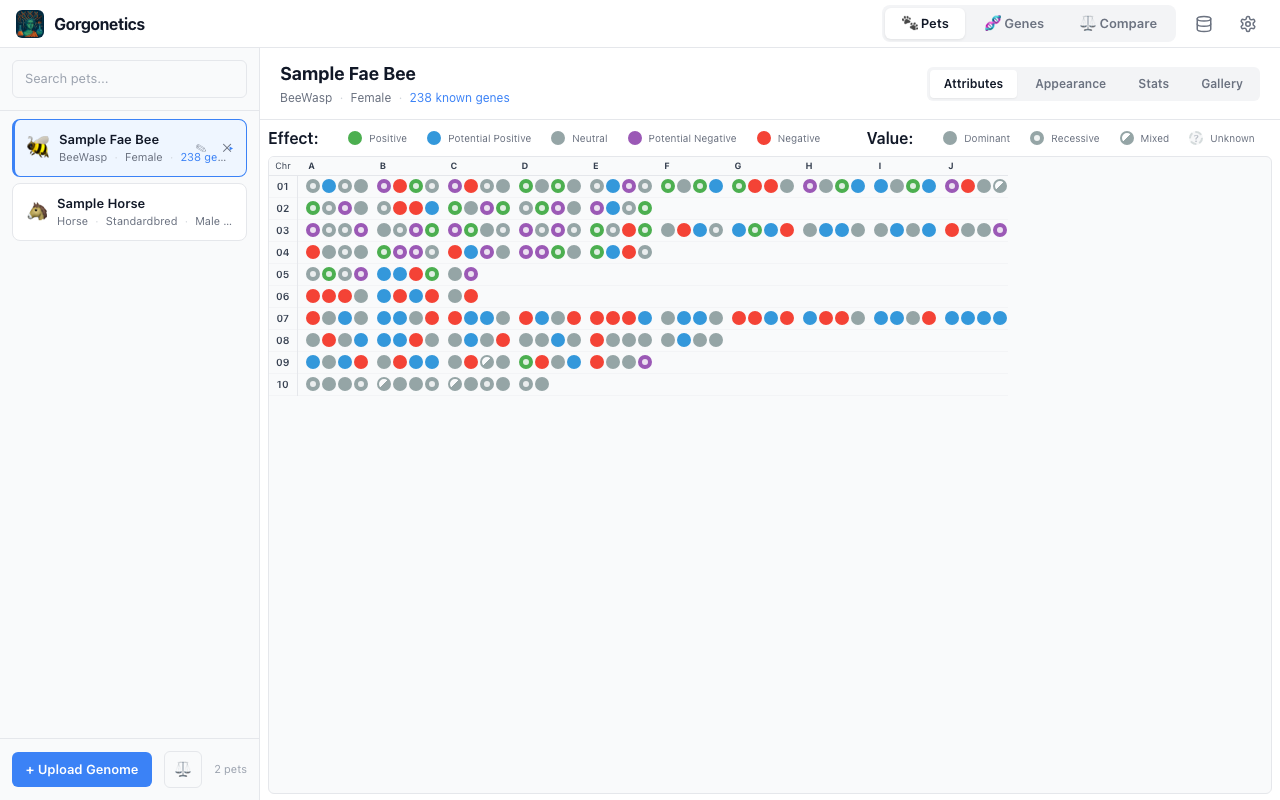
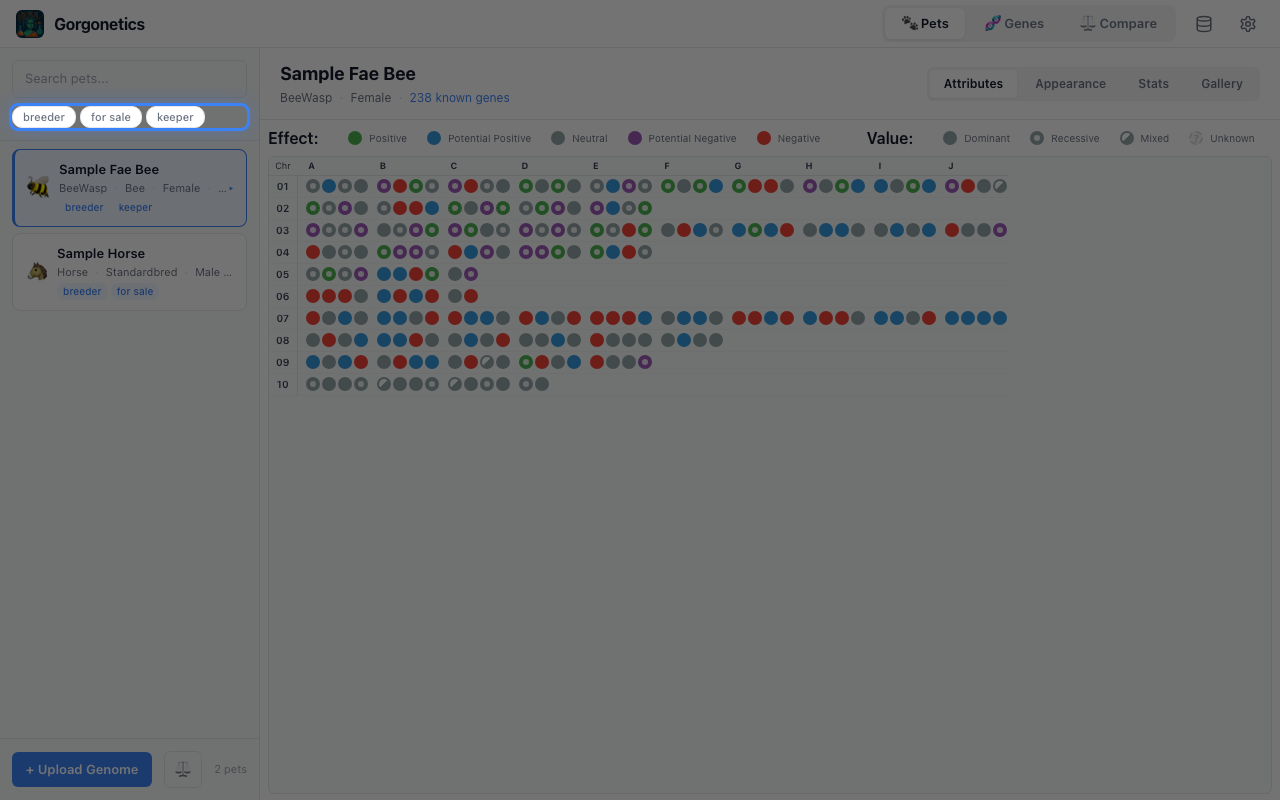
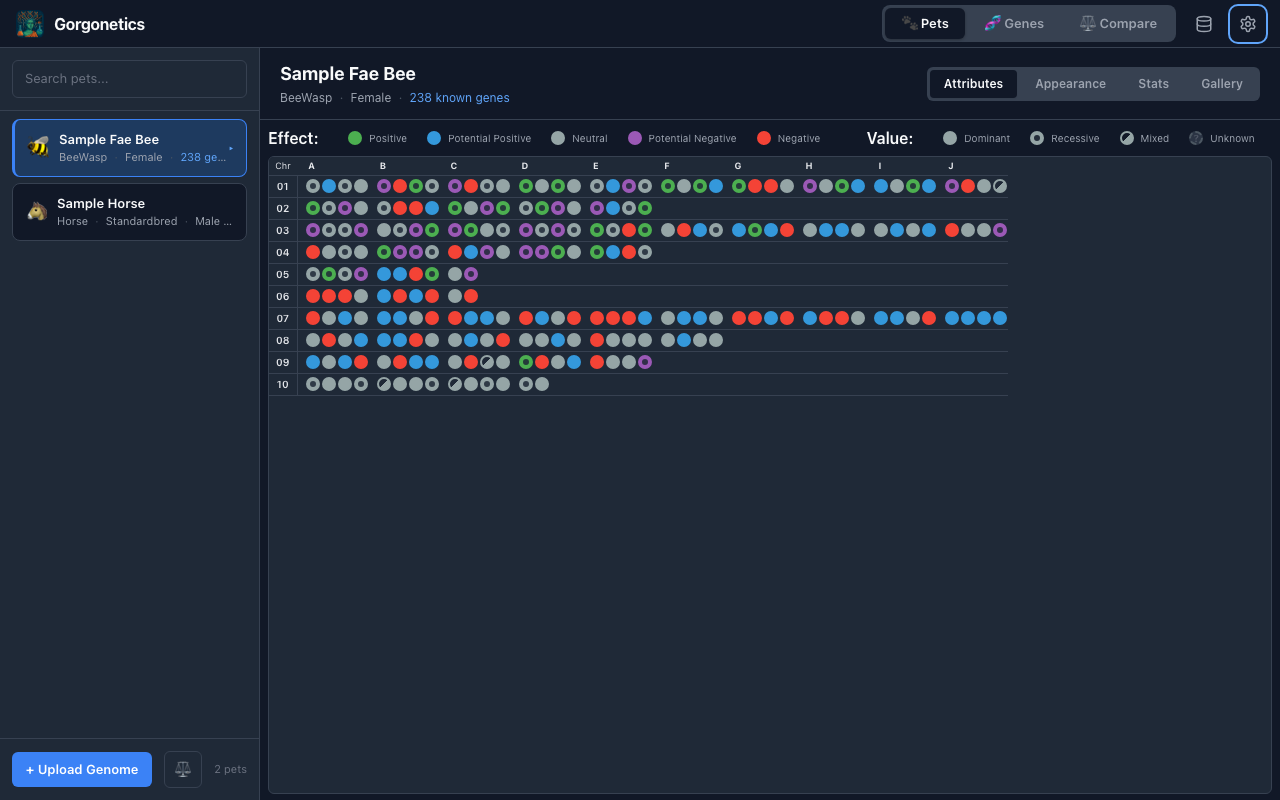
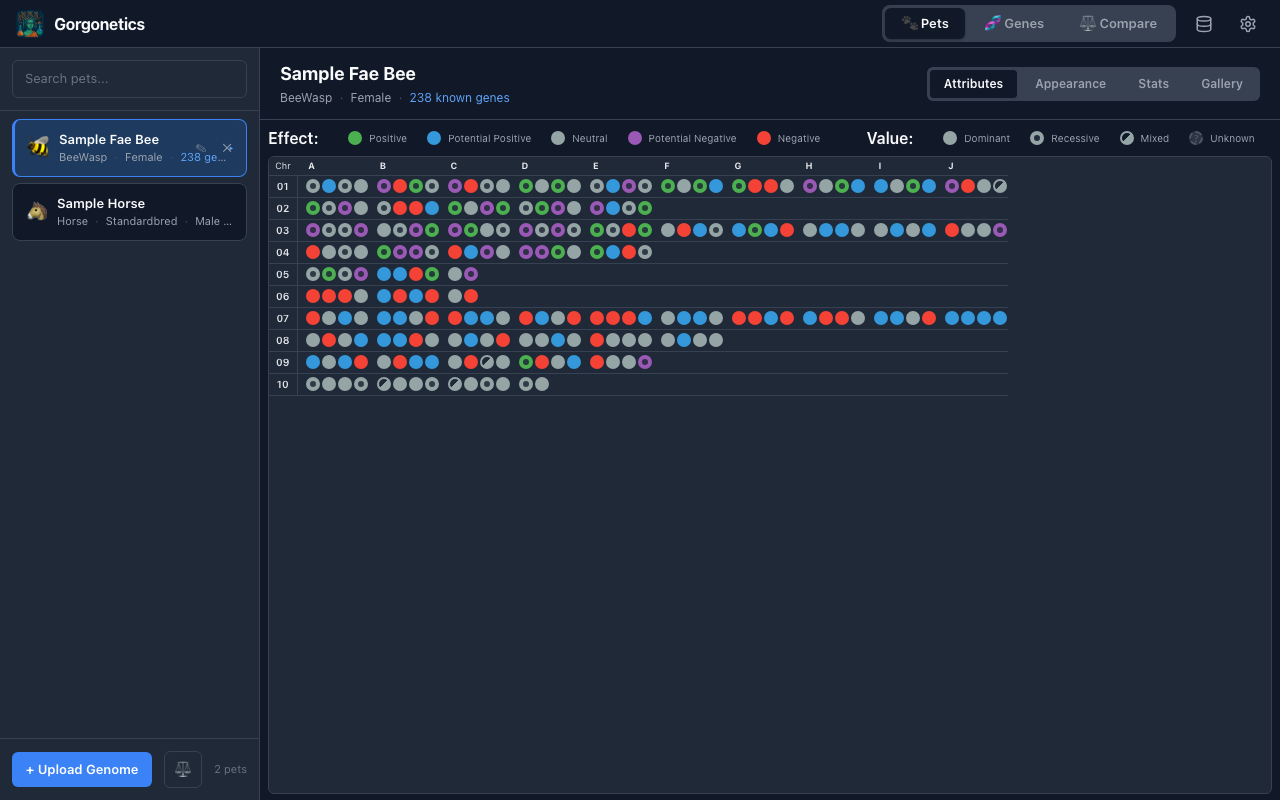
The app opens on the Pets tab. The left sidebar lists all your pets with their species, gender, and gene count. Click any pet card to select it and view its genome in the main panel.
Hover over a pet card to reveal the edit (pencil) and delete (×) buttons. Edit lets you change the pet's name, gender, breed, and attributes.
Upload a Genome
Click the "+ Upload Genome" button at the bottom of the pet list. Select a .txt genome file exported from Project Gorgon. The pet appears in your list immediately.
.txt files from the gameRead the Gene Grid
Click a pet to see its gene visualisation grid. Each dot represents a single gene, organised by chromosome (rows) and position (columns). The colours and patterns encode what each gene does.
Gene Dot Legend
Gene Type
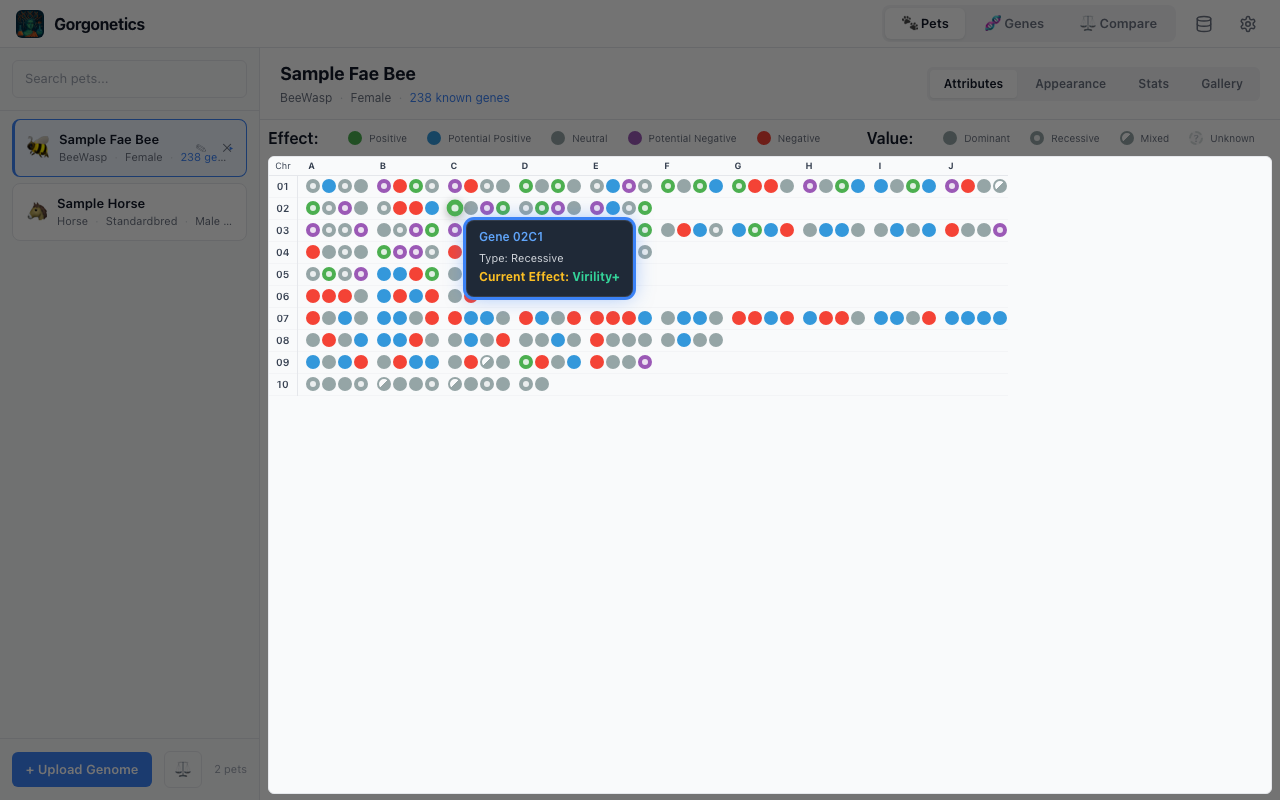
Inspect Individual Genes
Hover over any gene dot to see a tooltip with detailed information: the gene's ID, whether it's Dominant (D) or Recessive (R), and its current effect. This is the quickest way to understand what a specific gene is doing.
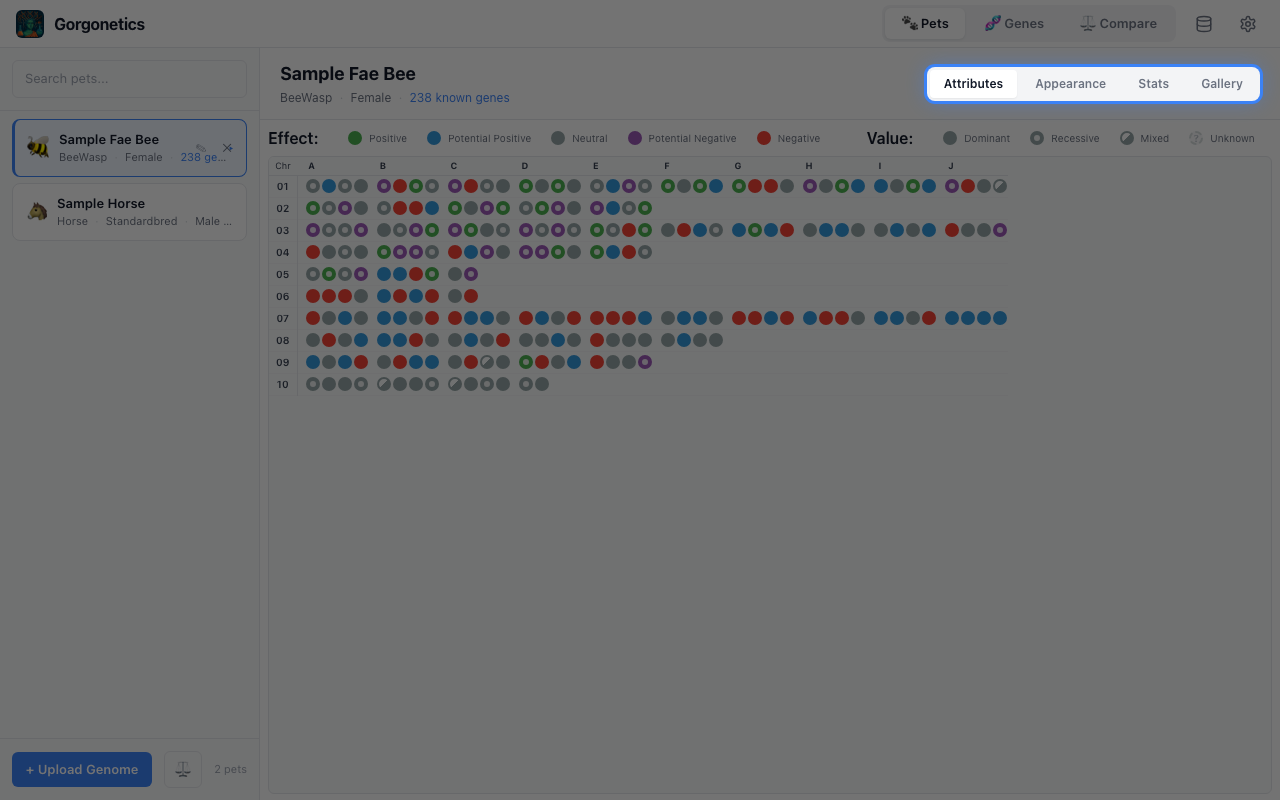
Switch Views & Check Stats
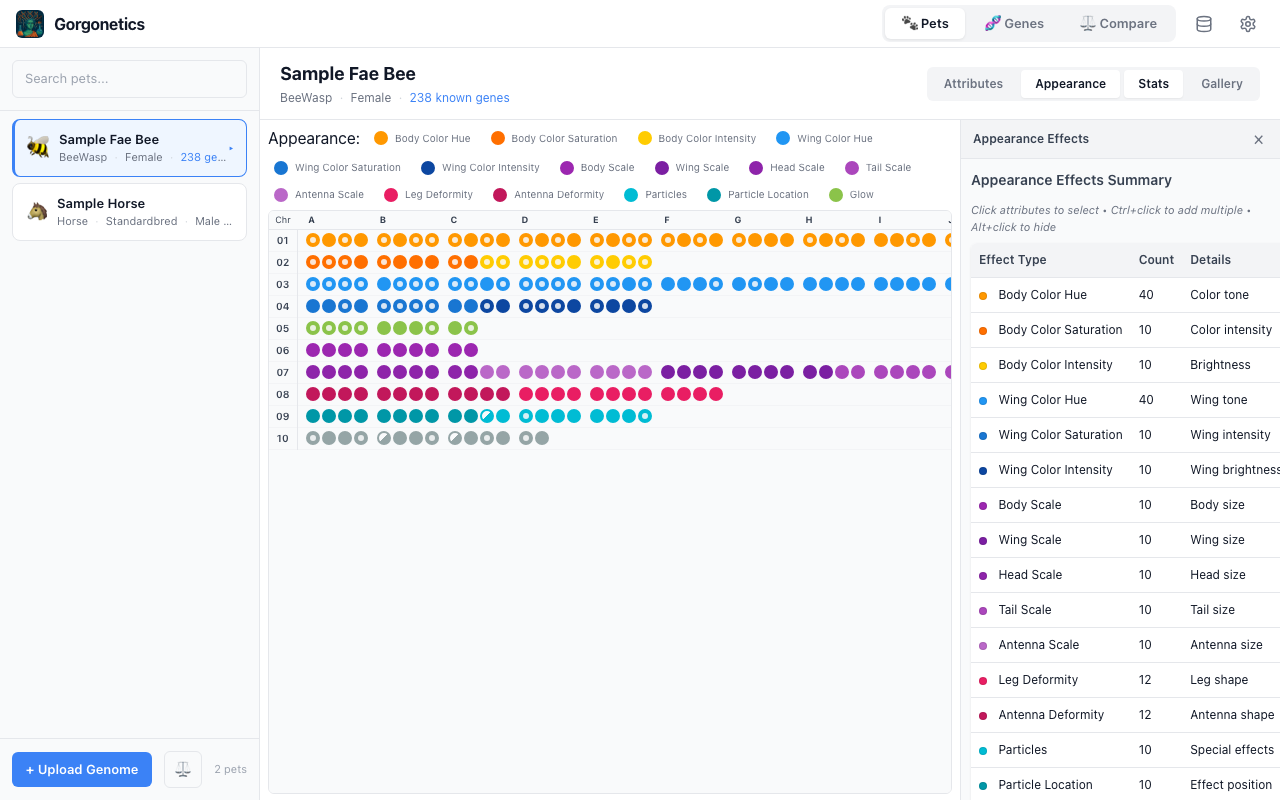
Use the buttons in the top-right corner to switch between views:
- Attributes — colours genes by gameplay attributes (Toughness, Intelligence, etc.)
- Appearance — colours genes by visual traits (body colour, wing scale, etc.)
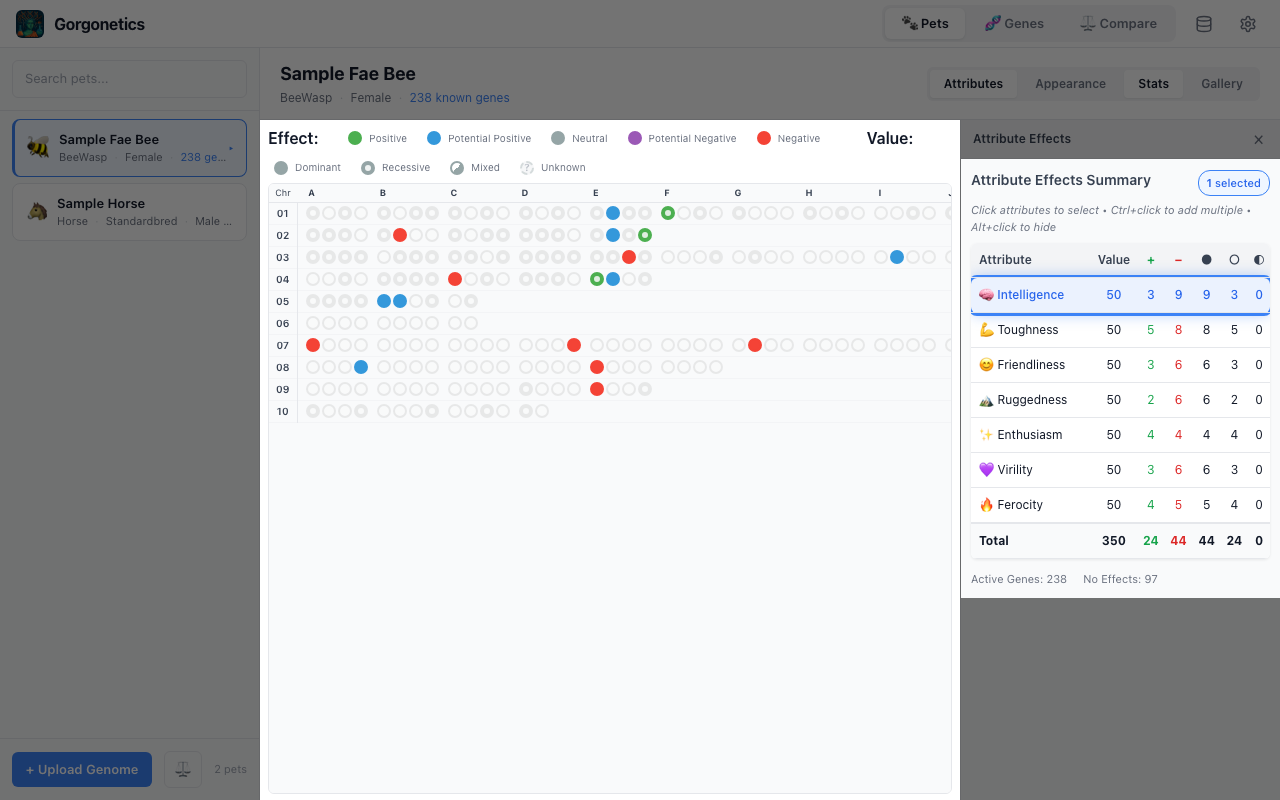
- Stats — opens the stats panel showing a summary of attribute counts and positive/negative breakdowns
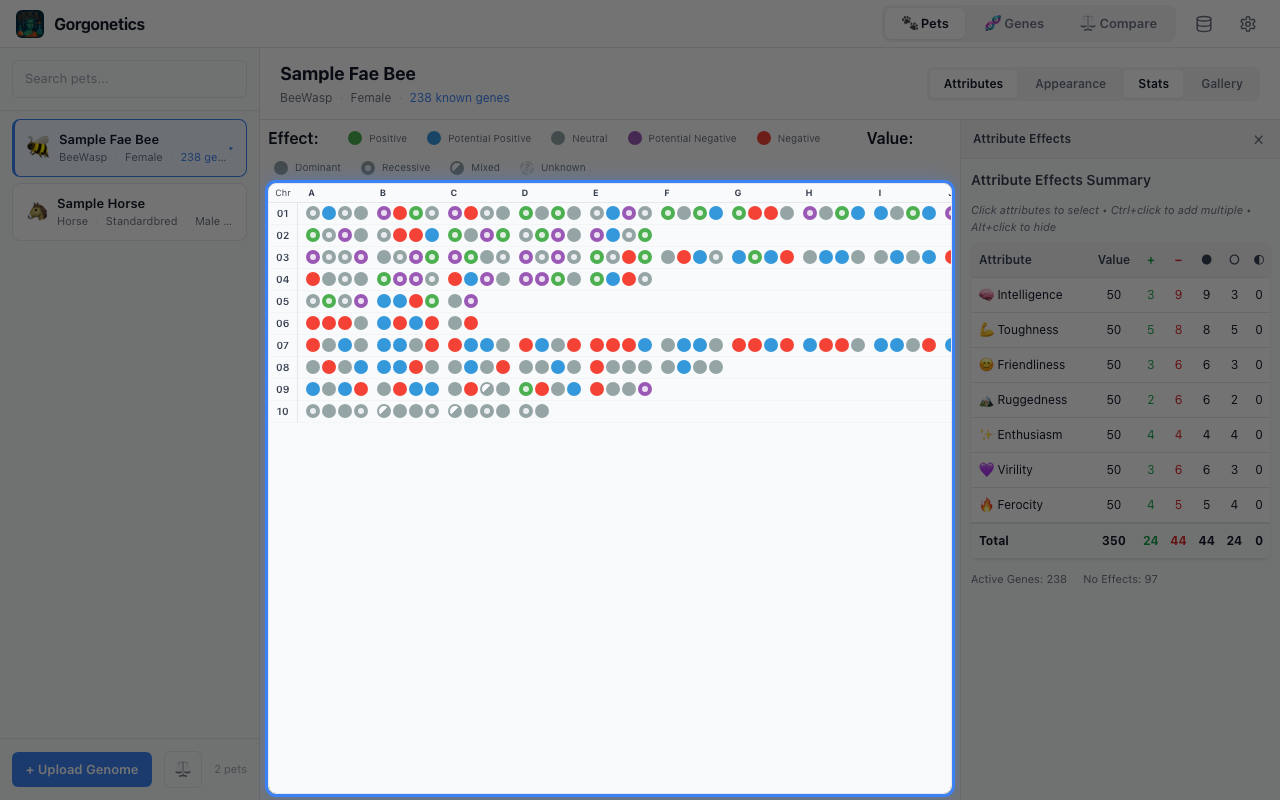
The stats table is interactive — click any attribute row to filter the gene grid down to just that attribute's genes. Everything else dims out so you can see exactly where those genes sit across the chromosomes.
- Click an attribute to select it and filter the grid
- Ctrl+click to select multiple attributes at once
- Alt+click to hide a specific attribute instead
- Click the selected attribute again to clear the filter
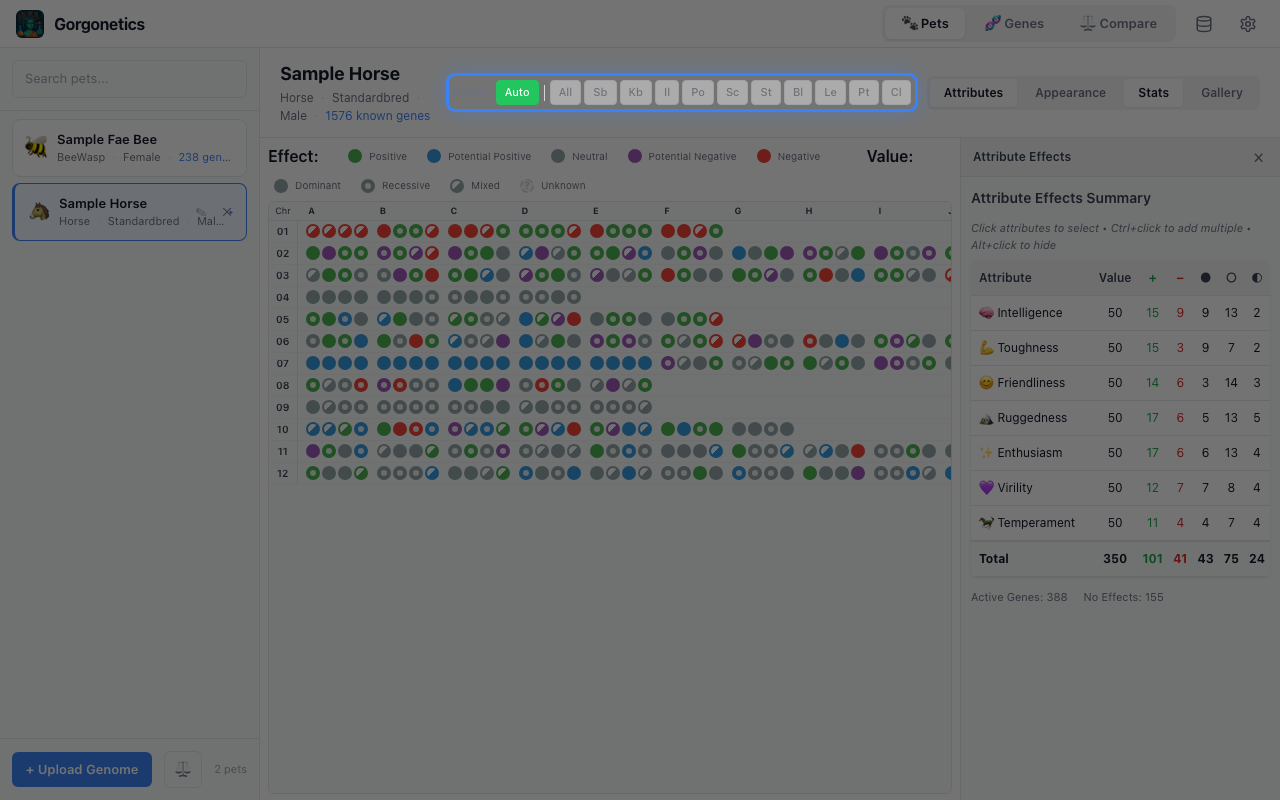
Horse Breed Filtering
When viewing a Horse pet, breed filter buttons appear above the gene grid. If the pet has a known breed, an Auto button activates automatically — filtering genes to that breed and greying out the manual buttons. Click Auto to toggle it off and choose a different breed manually.
- Auto (green) — automatically filters to the pet's breed. Manual buttons are disabled.
- Toggle Auto off — clears the filter and re-enables manual breed selection (All, St, Kb, etc.)
- You can control whether Auto is on by default in Settings (gear icon in the top bar)
Compare Two Pets Head-to-Head
Click the Compare tab in the top bar to compare two pets of the same species side by side. Pick two pets from the sidebar picker, or enter compare mode from the pet list and tick two checkboxes.
Once both pets are picked, three views are available along the top:
- Attributes — side-by-side attribute totals with the winner highlighted per row
- Gene Stats — positive/negative counts per attribute for both pets
- Genome Diff — the full gene grid for both pets aligned by position, with differences highlighted. Click a chromosome label to focus; Ctrl-click to multi-select, Alt-click to hide.
The Genome Diff grid has its own Attributes / Appearance toggle that mirrors the single-pet view — Attributes colours genes by effect direction, Appearance colours each gene by the trait category it controls (body hue, wing scale, coat, etc.). Each view has its own filter bar, shown only when that view is active.
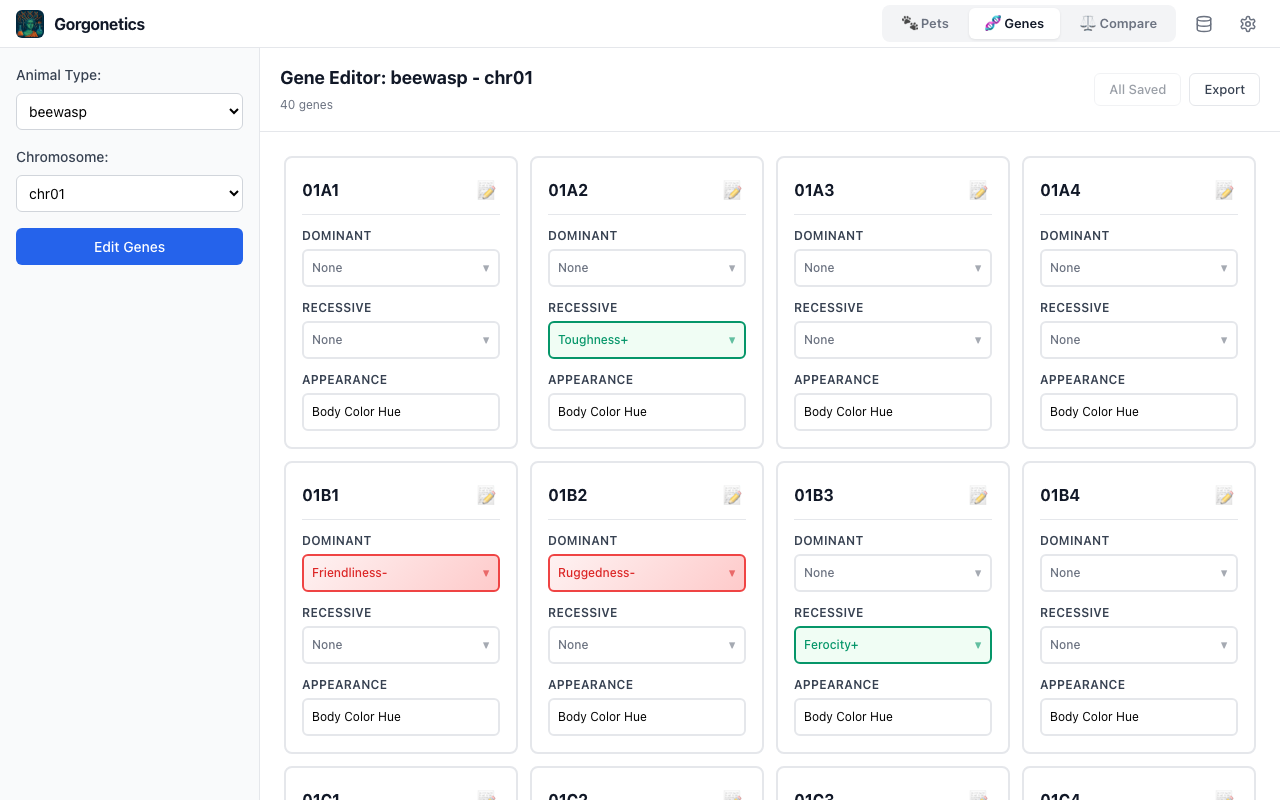
Edit Gene Effects
Switch to the Genes tab using the button in the top bar. The sidebar shows dropdowns to select an animal type and chromosome.
After clicking "Edit Genes", a table appears with every gene in that chromosome. Use the dropdowns to set the dominant and recessive effects, then click "Save All Changes".
Pet Image Gallery
Click the Gallery button in the view controls to switch to the image gallery. Here you can upload screenshots of your pets, view them in a thumbnail grid, and open them full-size in a lightbox.
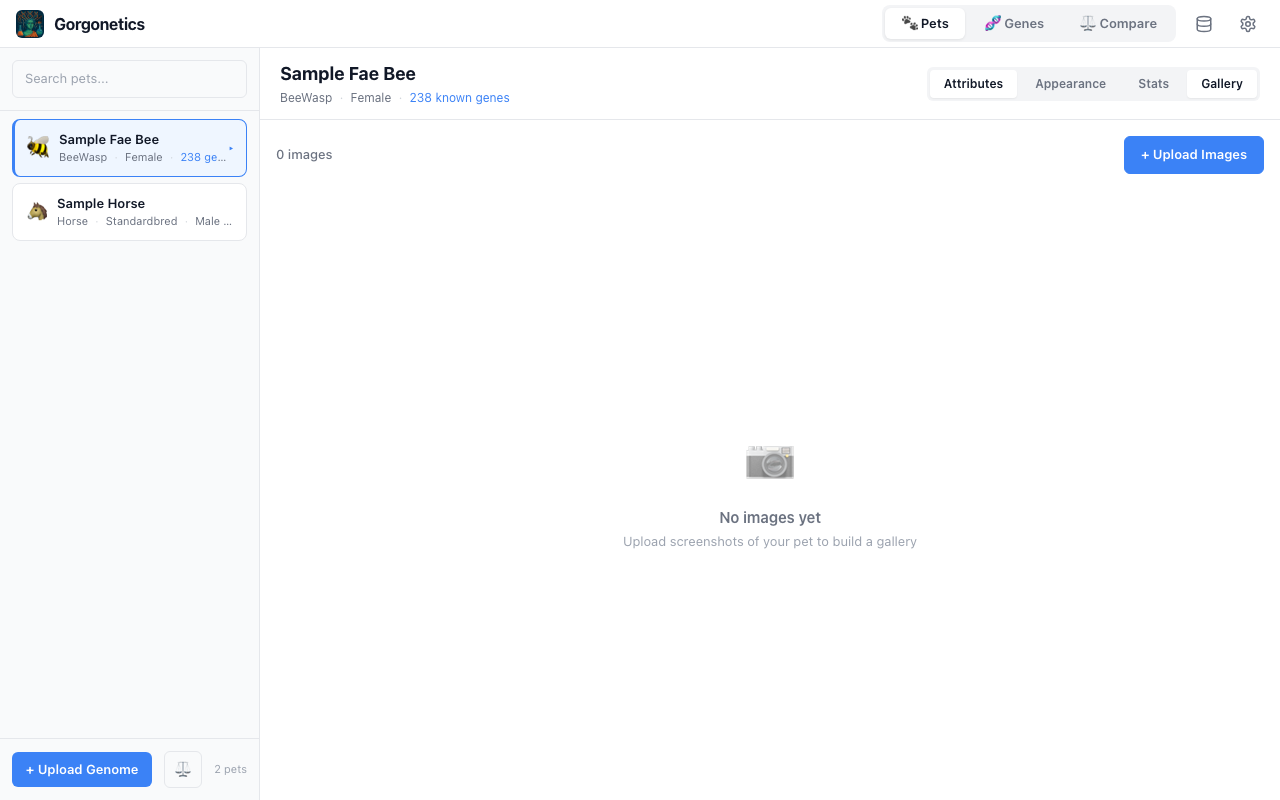
- Upload Images — click the button and select one or more images (PNG, JPG, WebP). They're stored locally with the app.
- Thumbnail grid — click any image to view it full-size. Use arrow keys or click the navigation buttons to browse.
- Delete — hover over a thumbnail and click the × button. A confirmation dialog appears before deletion.
Back Up & Restore Your Data
Click the database icon in the top bar to open the data management menu.
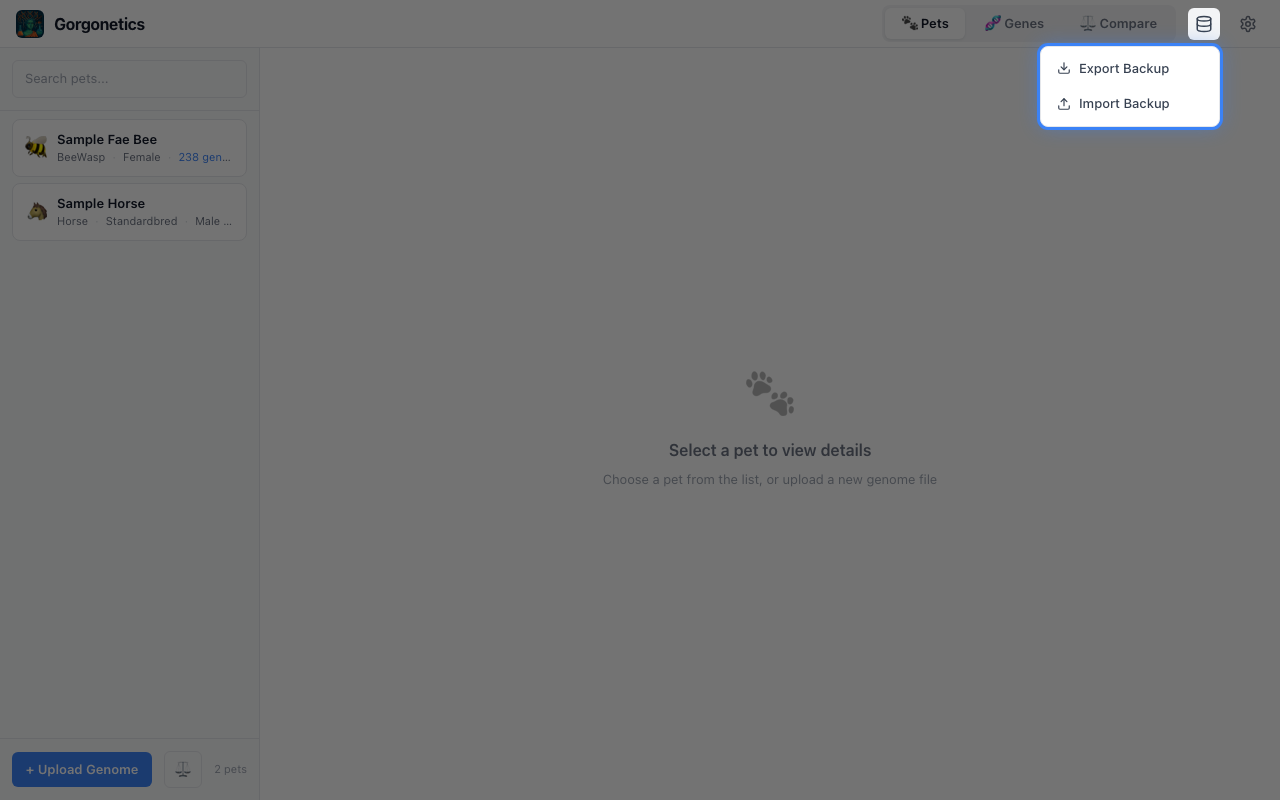
Export Backup opens a dialog where you choose what to include:
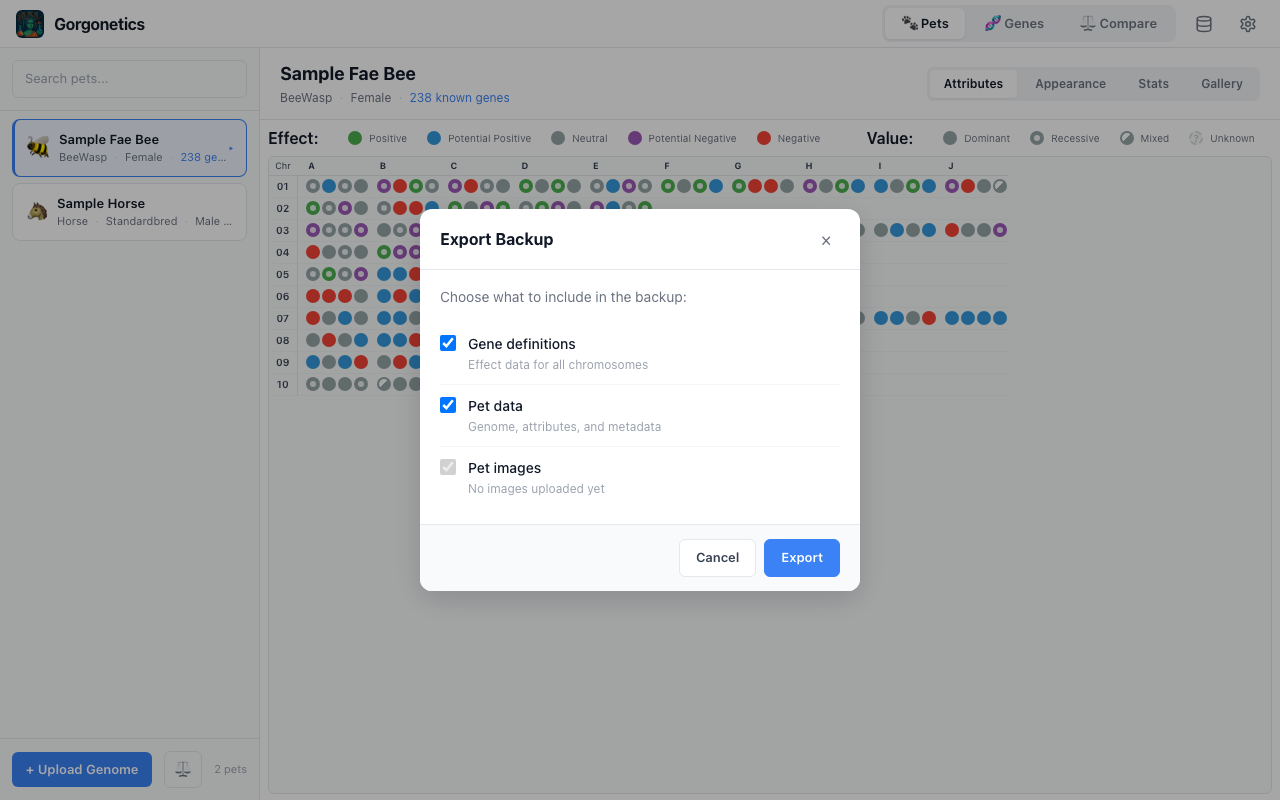
- Gene definitions — effect data for all chromosomes
- Pet data — genome, attributes, and metadata
- Pet images — all uploaded screenshots
The backup is saved as a .zip archive containing your selected data.
Import Backup lets you pick a .zip backup file. The app shows what the archive contains and lets you choose what to restore, with two modes:
- Replace — clears selected data and restores from the backup
- Merge — keeps existing data, adds new records, skips duplicates
Tag & Organise Your Pets
Add tags to your pets to categorise and filter them. Open the pet editor (hover a pet card and click the pencil icon) to manage tags.
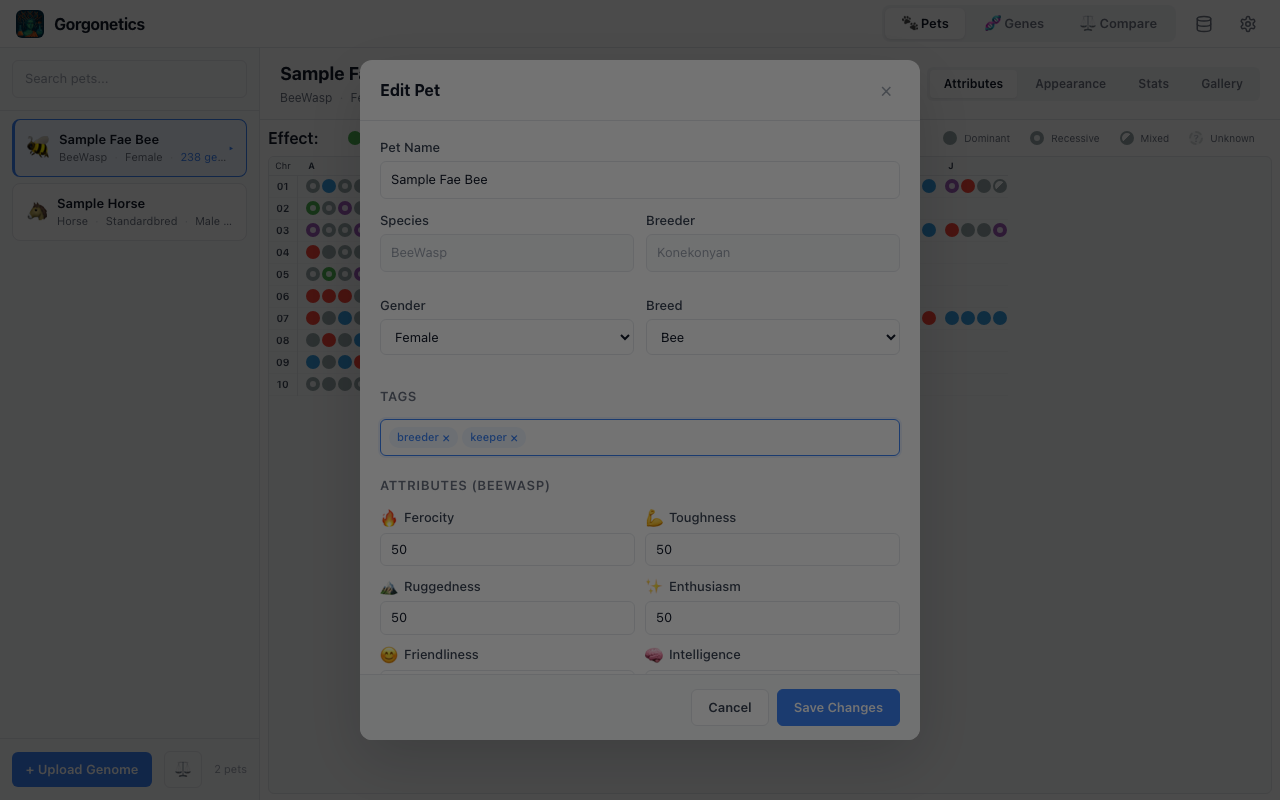
- Type and press Enter to add a new tag, or pick from the autocomplete suggestions
- Click the × on a tag to remove it
- Tags you've used before appear as filter buttons above the pet list — click them to filter
- Select multiple tags to narrow down further (all selected tags must match)
Dark Mode & Display Settings
Click the gear icon in the top bar to open Settings. The Display section lets you customise the look and feel.
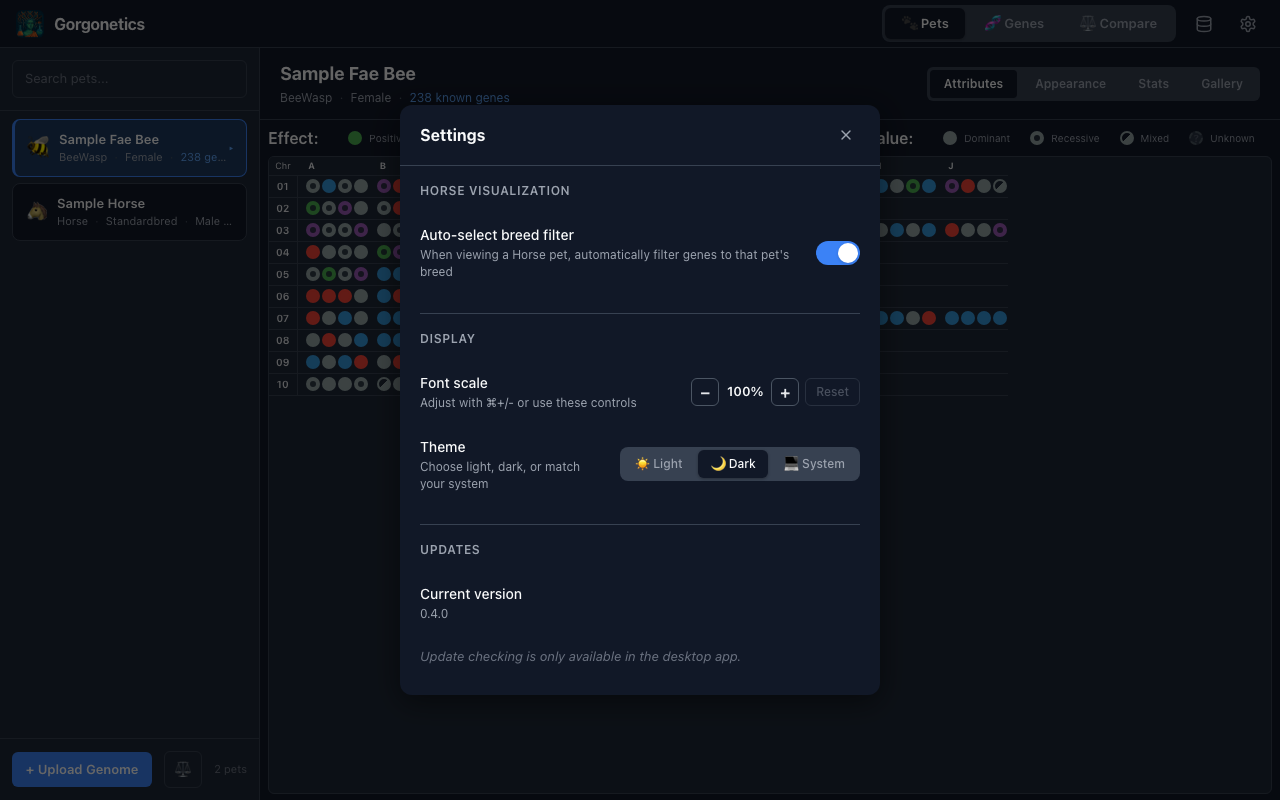
- Theme — choose Light, Dark, or System (follows your OS preference)
- Font scale — adjust text size from 75% to 150%. You can also use Cmd/Ctrl + +/- keyboard shortcuts, and Cmd/Ctrl + 0 to reset
Settings
The Settings panel (gear icon) also includes these options:
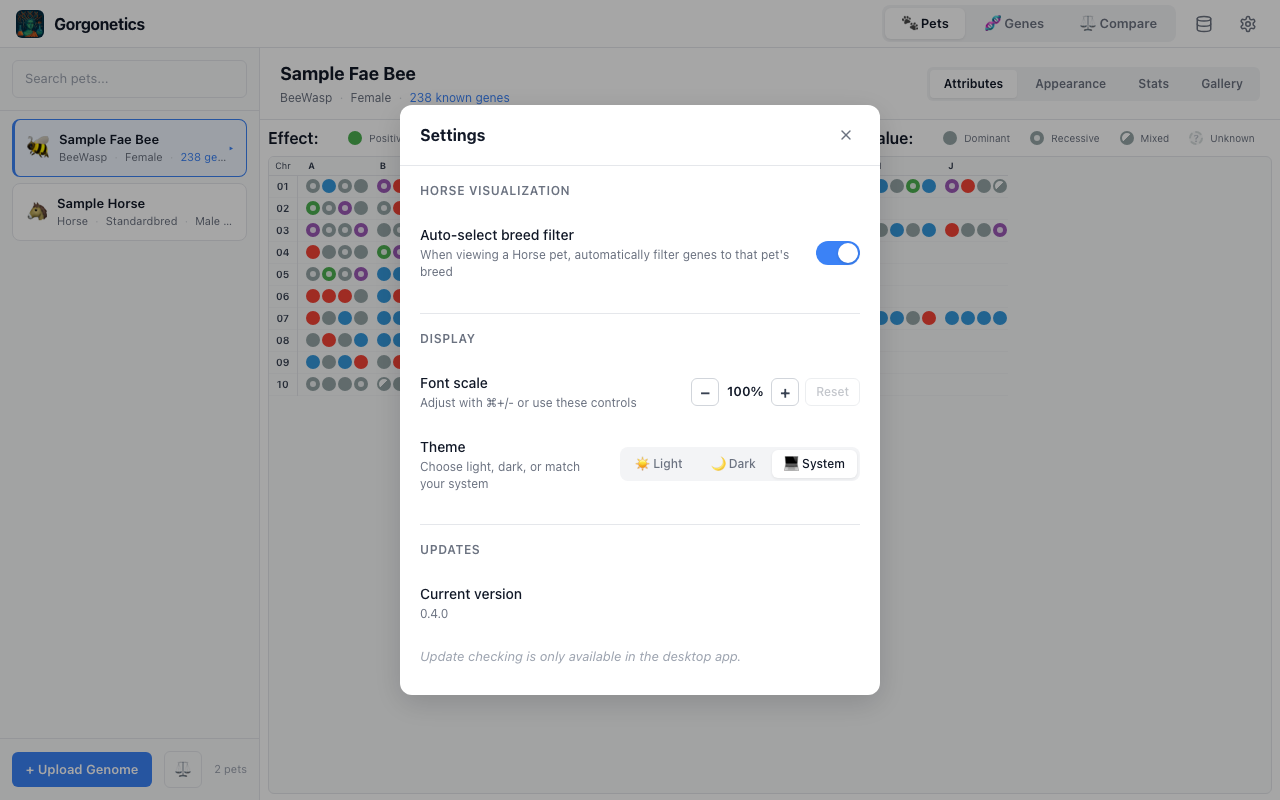
- Auto-select breed filter — when enabled (default), viewing a Horse pet automatically activates the breed filter for that pet's breed
- Check for updates — checks GitHub for new releases and can install them directly (desktop app only)
Keyboard Navigation
Gorgonetics is fully keyboard-navigable. Here are the key shortcuts:
- Tab — move between interactive elements. A visible focus ring shows what's selected
- Arrow keys — navigate between pet cards in the list, items in dropdown menus, and cells in the gene grid
- Enter / Space — activate buttons, select pets, or show gene tooltips
- Escape — close any modal, dialog, dropdown, or tooltip
- Cmd/Ctrl + Plus/Minus — increase or decrease font size
- Cmd/Ctrl + 0 — reset font size to default